Showing posts with label What I Made For $1. Show all posts

Thursday, June 9, 2011

What I Made For $1 Thursdays and 20% Off Sale

20% Off Entire Store With Coupon Code: 20UNTILFRIDAY until Friday at Midnight! 

Here's What I Made for $1:

Recycled Tshirt Pillow Covers
Great For Indoors and Outdoors! 


You will need:
An old tshirt, large enough for the pillow you will be covering
Scissors
A Flat, Clean Surface
Needle and Thread or Sewing Machine/Serger
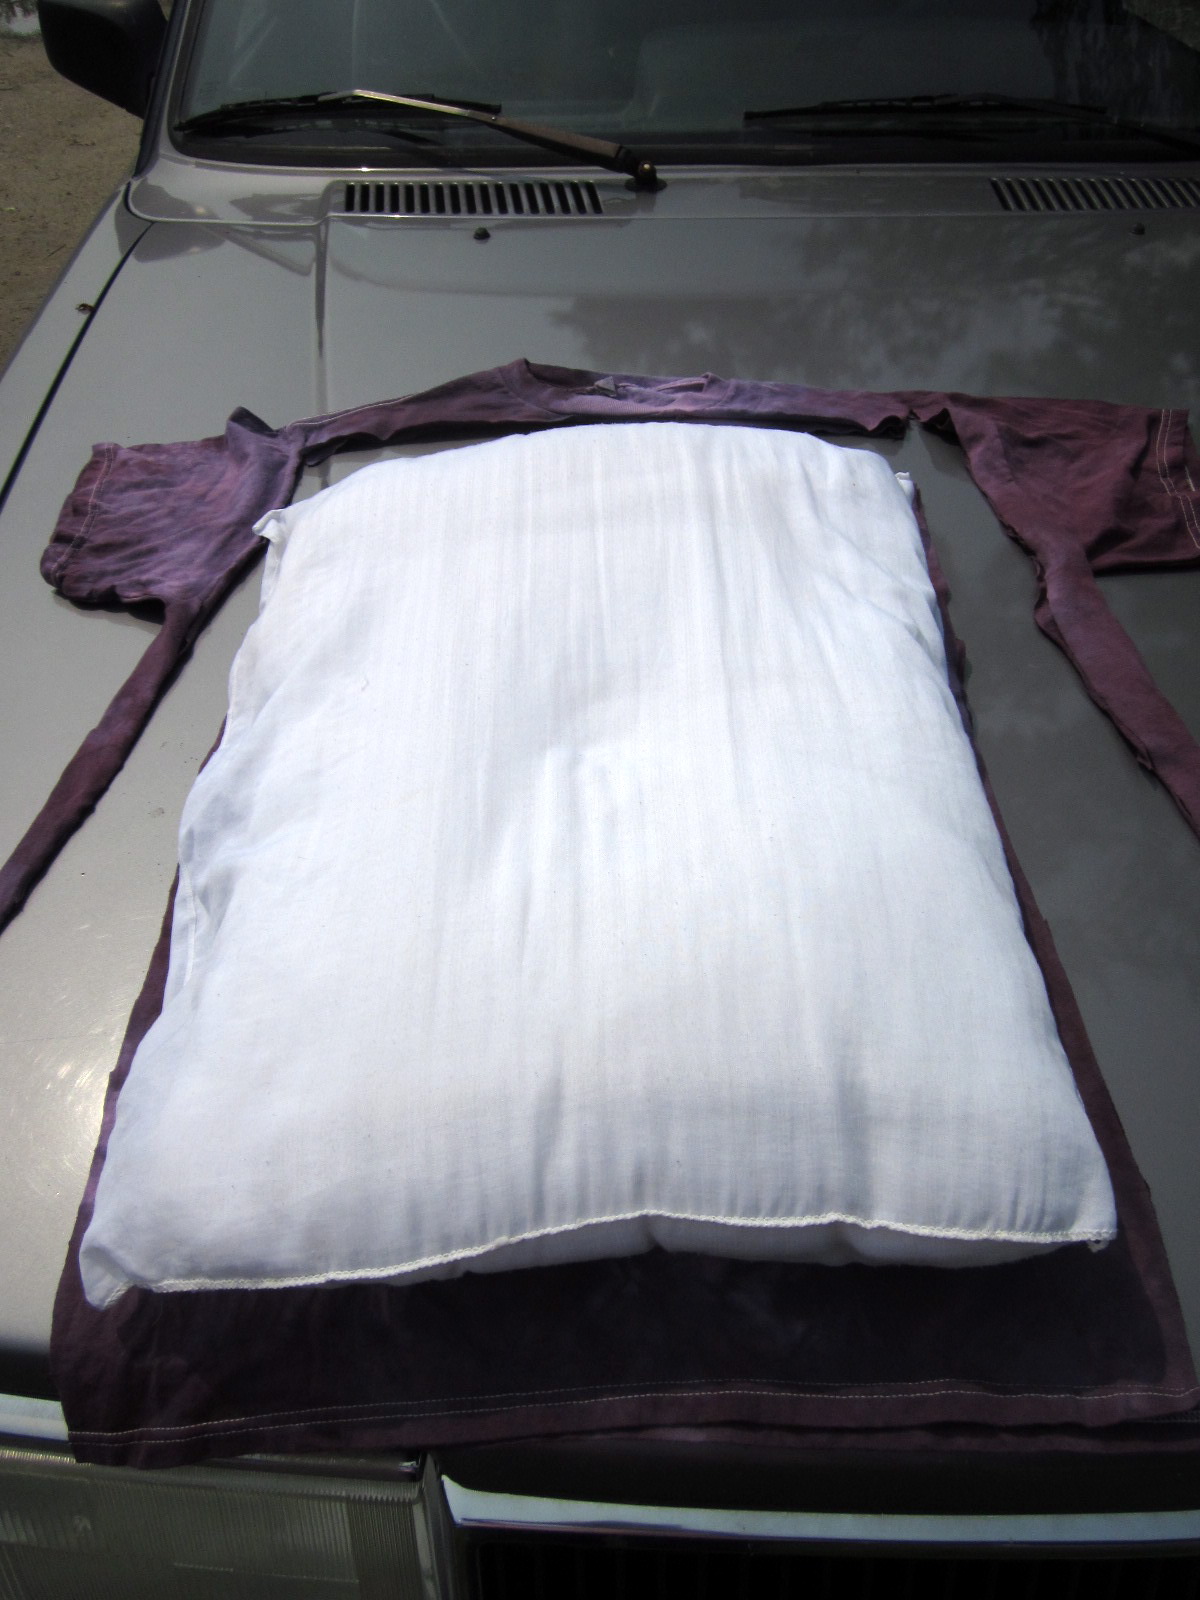
Step 1: Place the pillow you wish to cover over the tshirt, make sure there is at least 2 inches of excess fabric for each side
Step 2: Cut along sides of the tshirt, leaving enough room to sew a seam, leave the bottom hem of the tshirt intact, that will be your already finished edge of the pillow case opening.
Step 3: Repeat on the other side and then cut JUST below the collar line
Here's what you should end up with when you are done cutting


Step 4: Flip remaining pillow shape inside out and sew all three sides together, leaving the hemmed side open to slip the pillow into


Flip it right side out and it's ready for a pillow!


<3
Margaret at MGC

Thursday, May 19, 2011

What I Made For $1: Recycled Tshirt Tote Bag

This Thursday's What I Made For $1 is a lot of fun...and it only takes about five minutes to create!
Recycled Tshirt Shopping Tote
I got this pretty blue spiral tie dye at the Salvation Army for .99 and thought it would look great as a shopping tote.  No sewing Machine required!
I've seen this done many different ways but this is the way I do it, and I'd love to pass it along to you!

You Will Need: 
1 Tshirt
Scissors
Pins
Sewing Machine Or Serger Or Needle and Thread
Five Minutes of Uninterrupted Creative Bliss

Here are the steps:

1: Lay Tshirt Flat On Table
2: Cut Sleeves Of Leaving Serge Stitched Edge on Tshirt
3: Repeat Step 2 for other sleeve
4: Cut neckline in a U shape in the desired depth you'd like(don't cut to low or items might fall out of your bag!)
5: Cut the finished hems off of both sleeves and put aside for later (they will serve has cute little ties for the straps)


6: Cut bottom of tshirt off in a semi curve
7: Turn Tshirt inside out and pin bottom of tshirt into four inward facing folds(or more smaller folds if you'd like

8: Serge, sew with your machine OR hand stitch the bottom of the tshirt together.  
9: Turn Tshirt right side out 
10: Take the sleeve hems that you previously cut of tie them around the straps of the tshirt

11: It should look like this when you are finished! 
Here are some pictures of the completed tie dye bag!


<3 
Margaret at MGC

Thursday, April 28, 2011

What I Made For $1 Thursdays

Hello!
I'm going to start sharing some really great, amazingly cheap(and sometimes free!) projects you can do with your old clothing and fabrics.....I'm going to attempt to do this every Thursday!
Here is my first posting for What I Made For $1:

Hula Hoop Weaving
So far this week I've made a recycled tshirt fabric bowl (above)
and a beautiful recycled calico spring colored wall hanging/place mat/chair cushion/whatever you want it to be:


I am NOT good a writing instructions although some posts I may attempt to but luckily I've found a great blog(her blog is awesome!) called: Imagine Lovely and she has written out great instructions for us if you are interested in making your own piece! Here is the link.
I've used Tshirt material for the bowl.  I made a bowl shape by tightening the warp threads when I tied it off.  It made the woven tshirt fabric crunch back on itself which makes the circular shape.

The second piece is a lot more tight and solid since I used smaller thinner strands of calico cotton and only a few strands of magenta tshirt material.
You could also cut your plain colored plastic bags and when you are done spray paint the piece golden.
If you are making a wall hanging it would be great to hang little trinkets off the weave if you have an old orphaned earring laying around that needs an new home!

Materials:
Hula Hoop $1 at the Dollar Store...don't forget to experiment with size... tiny little hoops and huge 
hoops!
Warp Threads(anything you choose)
Weft Threads(also could be anything you choose).
This is also a great project because you can put it down and pick it up and continue anytime without loosing your place!
I hope you enjoyed this post and I'm already looking forward to the Next What I Made For $1!

LinkWithin

Related Posts Plugin for WordPress, Blogger...